
It has been sometime that I am using the strip feeder to perform the PNP job. However, one needs to cut the tape, fit it to position, and remove the plastic cover. And since a strip feeder usually has limited length, when all components are used, we need to cut the tape again and repeat the process, and hoping not creating the bouncing component problem. Then the leftover component needs to be stored somewhere so that next time we can find it and mount it again. And strip feeder also takes quite some space as well, making it not able to hold enough components.
So for me, I need to find a way to manage the components better, and also makes it easier to operate when components are consumed. And it has to take less space while being able to hold as many components as possible to reduce the reloading effort.
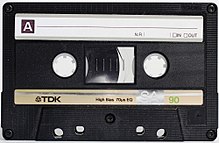
So it came to my mind when I was in high school, we listened to cassette music players, and it could be a perfect way of storing components, while it is still small in shape. And even better, in 3D printer, we have Z level space, which allows it to take less surface space but use more vertical direction.
So after some trial and error, I finally came with the design. It is easy to get the component in, the longest strip I can fit in for the cassette is about 32cm, which means it can fit around 160 components of 0402.
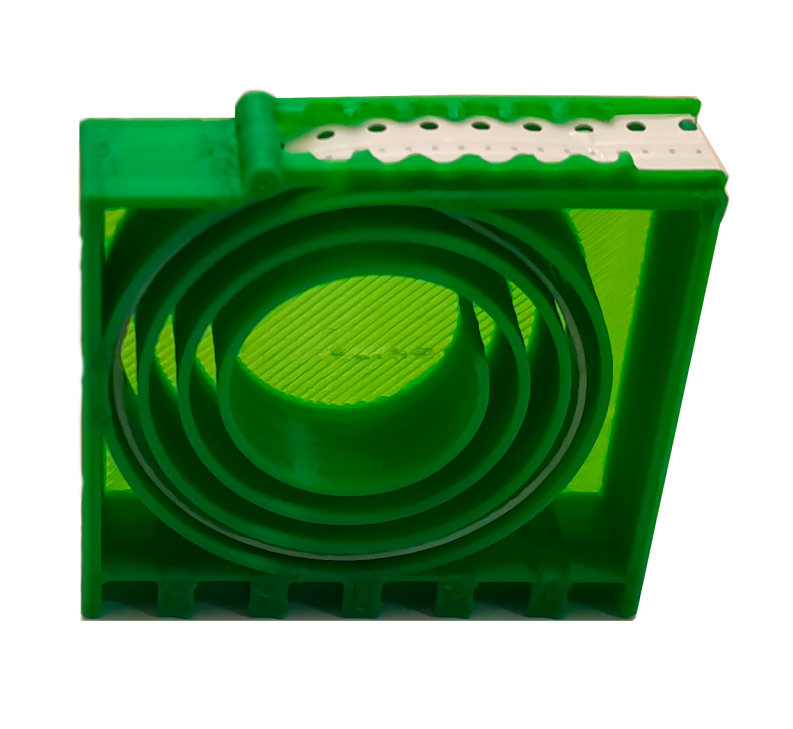
In order to make it slide in easily and into position, a spiral structure is used, and I also added in some guided line to make sure the friction is low. Then to manage the components well, I also leaved some room for marking which component is stored, so that I can easily identify the components. I am quite happy with the result so far, it makes organizing the components much easier for me.


